Pages

Showing posts with label July 4. Show all posts

Sunday, June 23, 2013

July 4th Projects

Besides Christmas, I think July 4th is one of my favorite holidays to decorate for. I crafted several things last year, and I made a few more this year. As you know, most of my crafts are easy and don't cost a lot of money to make, so I hope you give one (or more) of these a try!

First up is the Mini Wreath, which was inspired by this post. It just so happened I had a small foam wreath, linen fabric, patriotic fabric and some red burlap in my stash, so this project was easy for me to make.


I used pins to fasten the whole thing together - the stars/buttons are attached to the wreath with pearl pins.

My next project was this Patriotic Clothespin wreath for our front door:


Caity at DIY Navy Momma shared this tutorial. This was easy and fun to make, and I actually made two of them, one for me and one for a friend. Caity had the great idea of cutting a wire wreath form to get two wreaths out of one - so brilliant!

I had all of the spray paint on hand, so all I had to buy was the wreath form and the clothespins (pkg. of 100 at Wal-mart is less than $2). The only thing I did differently from her tutorial was to use contact paper I had in my stash to make the stars. I found it worked really well, as they stuck on the clothespin and were easy to remove (I have an old seam ripper that I use for craft projects - it worked great at removing the stars while they were still wet with paint!)

I saw this post by Misty at Creative Itch, but I did not want to go to the store to buy doilies. I went through my stash of scrapbook paper and came up with this:


I used my decorative-cut scissors and a hole punch and I think it turned out really cute! I had some red and white bakers twine that was perfect to string it on. 

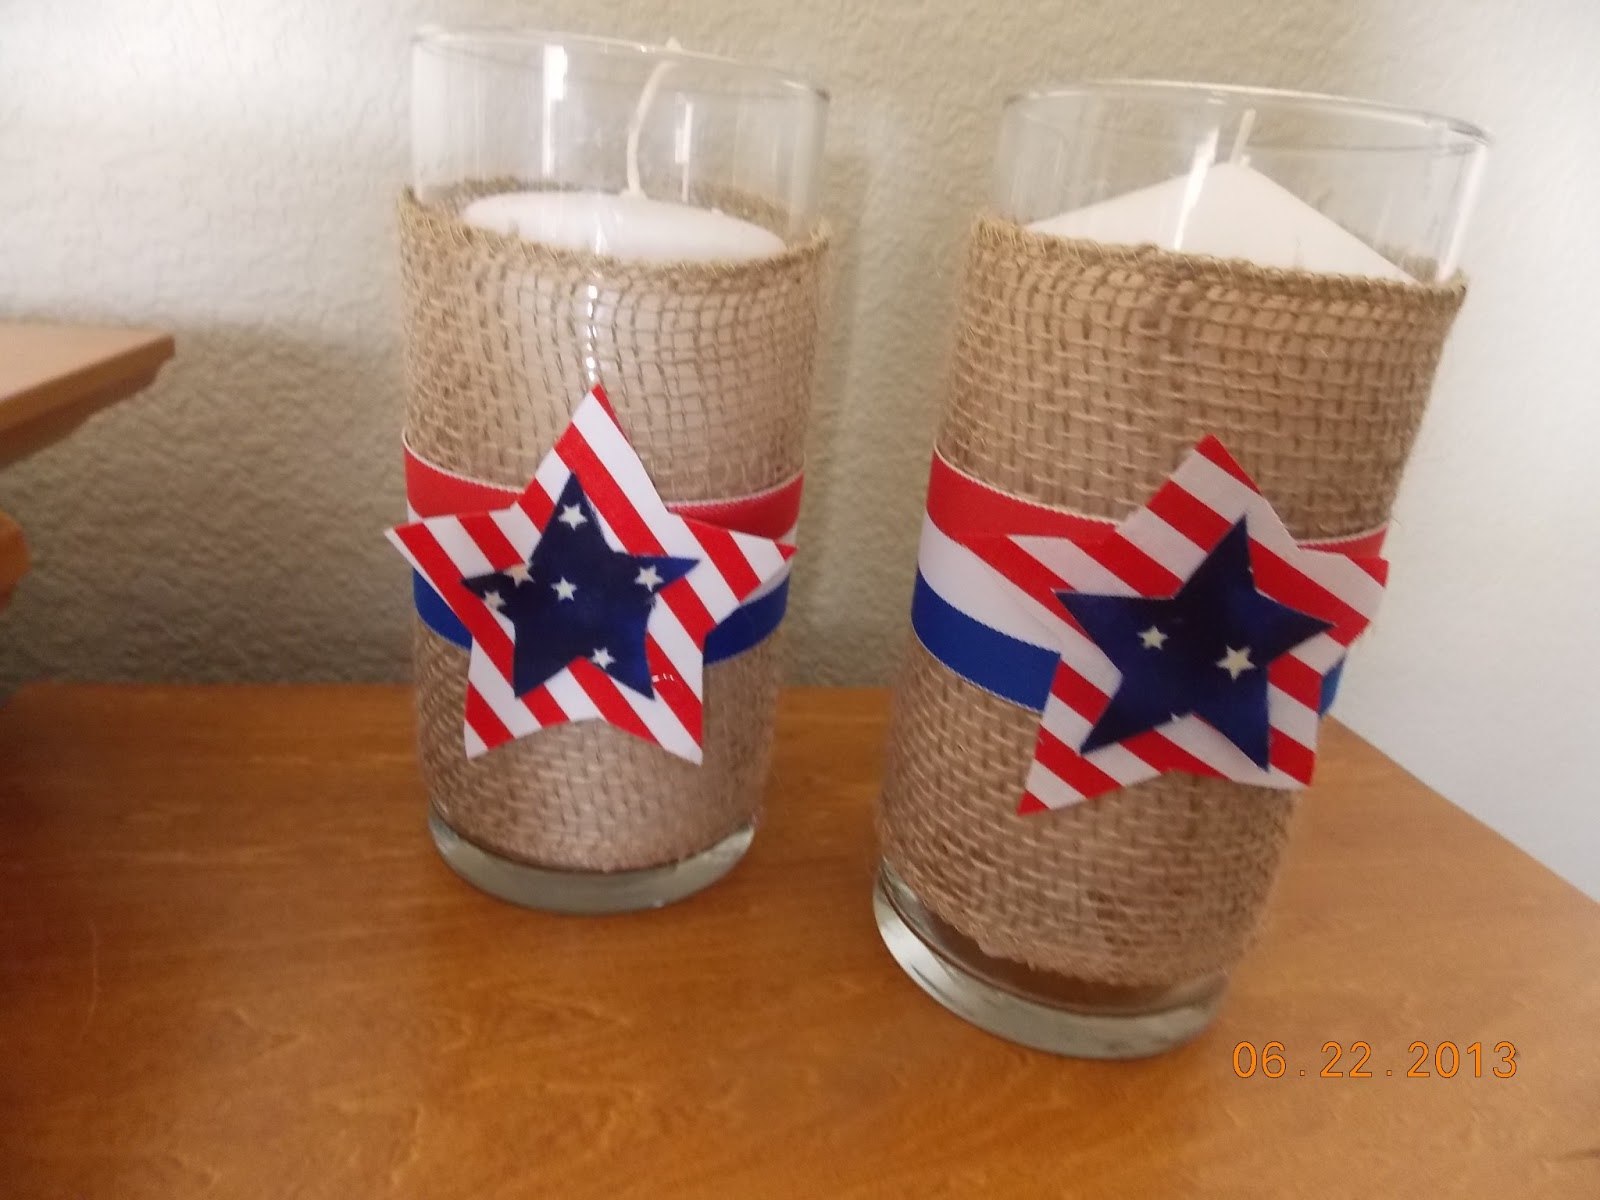
Finally, I loved what Angie made over at The Country Chic Cottage, but I was lazy and didn't want to make fabric yo-yos. After searching through my craft supplies, here is what I made instead:


I had the burlap ribbon and red/white/blue ribbon in my stash. I hot-glued them onto the candle holder, then cut out some stars and hot glued them on as well. Easy peasy!

Happy Crafting Everyone!


Linked up to:


The 36th Avenue


Saturday, June 23, 2012

Easy Patriotic Pillows - A Tutorial

I made this really cool Stars and Stripes Bunting the other day out of burlap:


(You can find the tutorial for it here)

After I made it, the wheels in my head started turning and an idea began to form. The pillow covers I made for the pillows that hang out on our gliders outside had gotten all faded from the sun, so it was time to make new ones. I wanted to replicate the Stars and Stripes look, and I wanted to keep the project on the cheap. The answer was ...........  canvas drop cloths!

Here is what the finished pillows look like:


I am so happy with how they turned out!  Let's get to the tutorial.


You only need a few things to make this project. You will need some pillow inserts, whatever size you like (mine were 14 X 14.) You will need some canvas drop cloths:


I got mine at Lowes, and they were on sale for around $4 each for the 4 X 5 size. I think I got four pillows out of two of these. They come in all different sizes, so you could buy a bigger size if unsure (and trust me, after making these, you will want to make more in different designs, so buy extra!!)

Then you will need spray paint. Here is what I used:


I got mine at Wal-mart for around $3.47 a can. The colors are True Blue and Banner Red. While I was at Wal-mart, I picked up some Con-tact Paper for $5.48 a roll:


It is in the kitchen area with all the other shelf liners. I don't have any of that vinyl stuff you can order on-line, but if you have that you could use it instead. This roll of contact paper will last me a long time.

You need to wash your canvas drop cloths and then give them a good ironing. I read somewhere that you should bleach the drop cloths, so I did.

Start by cutting out your canvas drop cloth to the size you will need. I make my pillows envelope- back style, so I cut my front piece 1 inch larger than my pillow form, and the back piece 1 inch wider and 4 inches longer than my pillow form. So for my 14 x 14 pillow, my front piece was 15 x 15 and my back piece was 15 x 18. You then cut the back piece into two equal pieces along the width (each piece is now 15 x 9). At the spot where I cut it, I folded the edge over 1/4 of an inch, ironed it well, and then stitched it. Set aside the back pieces for now.


Now it's time to paint! First, either free hand draw a star on the white side of the contact paper or do like I did and Google "star stencil" and print out a star shape and trace it onto the contact paper, then cut it out. I used one big star and 3 little stars, but you can do yours however you like.

* Here's a neat tip for you - to easily get the paper piece off the back side of the contact paper, GENTLY score it with your seam ripper. Ask me how I know to do it gently so that you don't make holes in your stars and have to cut out some more!!!

Apply the stars to your front piece and spray paint away. The spray paint I used said it dries in 10 minutes or less and they weren't kidding!


For the stripes, I just cut out two pieces of contact paper. No, they're not perfectly straight, but that's okay with me!


Then spray this piece with your red paint and let it dry. Once your front pieces are dry, peel off your stars and stripes.

Now it's time to sew the pillow. Put the front piece down with the pretty side facing you. Then put your two back pieces on top of that, pretty sides down. Make sure the hemmed pieces are in the middle of the pillow.

 Pin it, and sew all the way around with 1/4 inch seam. Trim the excess from the corners and then turn it right side out through the opening and you are done!


Our gliders have a matching table and chairs, and I noticed that the chair cushions are faded, so I'm thinking I will use the canvas drop cloth I have left and re-cover those cushions too!

The possibilites truly are endless for this project. Here are just a few other ideas:

  • Use other designs to make "every day" pillow covers (flowers, your initials, your house number)
  • Make different seasonal pillow covers that you can display all through the year (Valentines, Christmas, Easter etc.)

I hope you enjoyed this tutorial. If you make some pillows, please send me a link, I would love to see them!


Linking up to:


Friday, June 8, 2012

Birthday Shirt and Patriotic Wreath

We are going to our great-nephew's birthday party tomorrow, he turns 2 already. Seems like only yesterday I made all of his baby gifts - he was the first one I made things for when I got into sewing :)
I saw this great tutorial for an Elmo shirt, and since Kael absolutely ADORES Elmo, I knew it would be perfect for him.


This is the front of the shirt. I had a hard time finding a solid red shirt with no design or writing on the front, so I had to settle for this one with the pocket.  Here is the back:


I used my letter and number stencils and some scrap black fabric to make the "I'm 2" on the back.

When I was making Elmo's face, I sewed each piece on individually. I started with the white for his eyes, then did the orange nose, and finally the black eyes and mouth. I did a tight zig zag stitch around each one (hard to see in the picture). I adhered them with Heat n Bond, but I always like to sew them on too so they will make it through the laundry okay. I did the same thing on the back. I can't wait to see him wearing it tomorrow!


I decided to make a new Fourth of July wreath this year, as the one I made last year was just too small for our front door. Once I saw Courtney's Rag Wreath over at A Diamond in the Stuff, I knew that was what I wanted to make.

The best part of this project is that it was absolutely free!  I had a wreath form in my stash that I had already (mine was made out of pipe insulation too!) and my SIL gifted me with a bunch of fabric recently, so the fabric was free too! The ribbon came off of last year's wreath.


I cut my fabric into strips that were 2 X 12. The pipe insulation is kind of thick, so that's why I made my strips a little longer.  This is an easy project, it just takes awhile to cut all the strips and then tie them onto the wreath.

Thanks to Kirstin and Courtney for their tutorials!


Thursday, June 30, 2011

More July 4th Decorating

So I decided I wanted to make a Fourth of July vignette for inside the house after making my easy wreath the other day. Once again, Dollar Tree and Wal-Mart to the rescue!


I got most everything at Dollar Tree - think the only things I got at Wal-mart were the red candle, the flag and the white picture frame.


I just found Landee's blog the other day and I love it... she is so creative. You should see what she did with styrofoam and thumb tacks!!

I love doing vignettes like these for the holidays ... they are so much fun!

Tuesday, June 28, 2011

Easiest 4th of July Wreath Ever

I can't believe July 4th will be here so soon! I wanted to make something for the holiday, but my craft room is not organized yet, so I couldn't get to my "stuff." So I went to the dollar store to see what I could find, and here is what I came up with:


The whole thing cost me around $5 and took about 5 minutes.... easy peasy! Here are the supplies you will need:


Grapevine wreath (I could only find a 9 inch one, would have preferred bigger, but that is all they had); ribbon; glittery star garland and some patriotic bows. I purchased everything at Dollar Tree with the exception of the ribbon; I found it at Wal-Mart.

First thing I did was wrap the ribbon around the grapevine wreath. I secured it in the back with a pin:


Next came the star garland. Again, I just wrapped it around the wreath:

The patriotic bow came with its own twist tie, so I just wrapped it around the wreath and secured it in the back. That was it!


That was definitely the easiest wreath I have ever made! If you need a quick holiday decoration, give this one a try.

Happy 4th Everyone!