Pages

Showing posts with label Wreath. Show all posts

Sunday, October 6, 2013

Some Recent Projects

Here are some of the things I've made in the last month or so:


Halloween Charger


Wood Sign I made for our dog's groomer


Wreath (inspired by wreath found HERE)


Christmas ornaments


Halloween glass jar


Sunday, June 23, 2013

July 4th Projects

Besides Christmas, I think July 4th is one of my favorite holidays to decorate for. I crafted several things last year, and I made a few more this year. As you know, most of my crafts are easy and don't cost a lot of money to make, so I hope you give one (or more) of these a try!

First up is the Mini Wreath, which was inspired by this post. It just so happened I had a small foam wreath, linen fabric, patriotic fabric and some red burlap in my stash, so this project was easy for me to make.


I used pins to fasten the whole thing together - the stars/buttons are attached to the wreath with pearl pins.

My next project was this Patriotic Clothespin wreath for our front door:


Caity at DIY Navy Momma shared this tutorial. This was easy and fun to make, and I actually made two of them, one for me and one for a friend. Caity had the great idea of cutting a wire wreath form to get two wreaths out of one - so brilliant!

I had all of the spray paint on hand, so all I had to buy was the wreath form and the clothespins (pkg. of 100 at Wal-mart is less than $2). The only thing I did differently from her tutorial was to use contact paper I had in my stash to make the stars. I found it worked really well, as they stuck on the clothespin and were easy to remove (I have an old seam ripper that I use for craft projects - it worked great at removing the stars while they were still wet with paint!)

I saw this post by Misty at Creative Itch, but I did not want to go to the store to buy doilies. I went through my stash of scrapbook paper and came up with this:


I used my decorative-cut scissors and a hole punch and I think it turned out really cute! I had some red and white bakers twine that was perfect to string it on. 

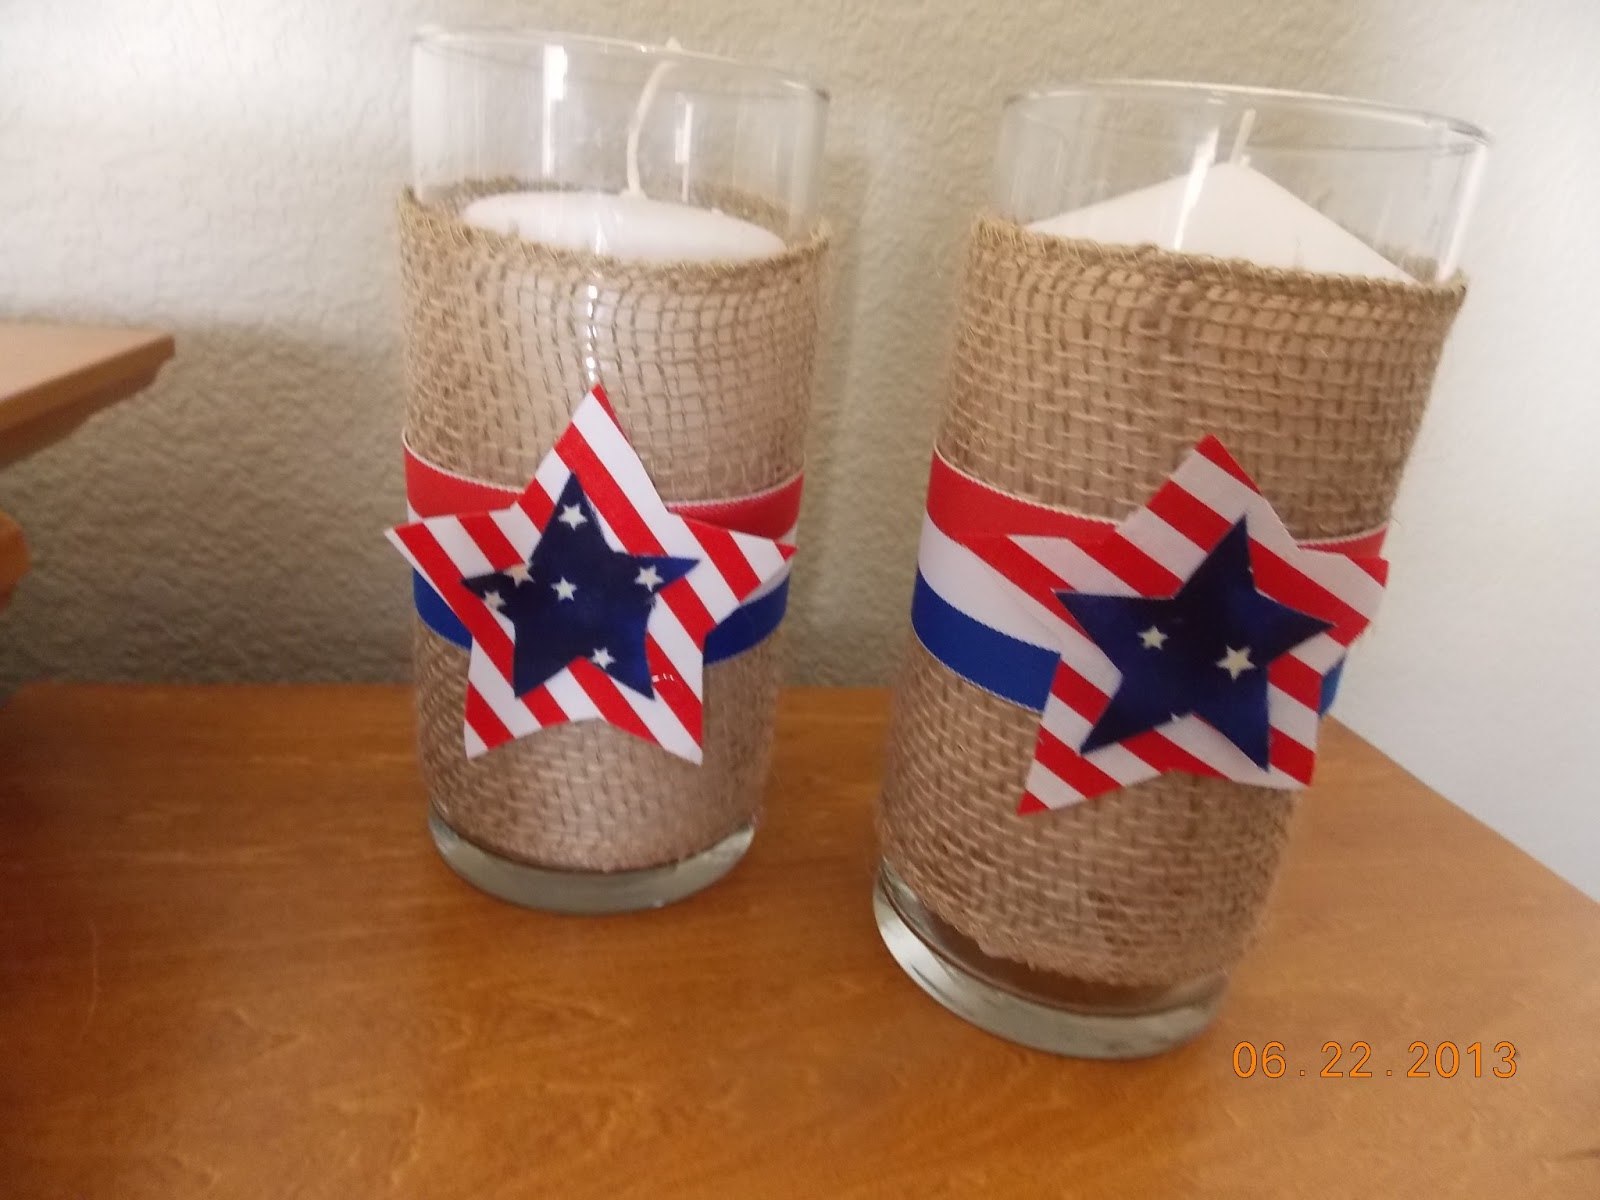
Finally, I loved what Angie made over at The Country Chic Cottage, but I was lazy and didn't want to make fabric yo-yos. After searching through my craft supplies, here is what I made instead:


I had the burlap ribbon and red/white/blue ribbon in my stash. I hot-glued them onto the candle holder, then cut out some stars and hot glued them on as well. Easy peasy!

Happy Crafting Everyone!


Linked up to:


The 36th Avenue


Friday, April 26, 2013

Wreath-Mania

Lately it seems that all I have been wanting to craft are wreaths - I'm not quite sure why, but for some reason I just love crafting them (and then giving most of them away!)

As usual, I was inspired by things I saw on blogs or Pinterest. This first one I made was actually a combination of two different wreath tutorials that I saw - this one here and then this one. I loved the look of the first one, but I liked how she made her flowers in the second one, so I combined the two and made this:


I used a straw wreath form and wrapped it in some burlap garland (found in the floral section at Walmart) and attached it with straight pins. Then I made my scrapbook paper flowers and pushed them into the wreath with pins. Finally, I made my ribbon and once again, just pinned it to the wreath. I think this wreath took me all of 30 minutes to make and it turned out so cute. I made it for a dear friend of mine, and I plan on making her different flowers and ribbons so that she can just remove these and change the look in a matter of minutes!

Here is the second wreath I made:


I followed the tutorial found here. Believe it or not, this wreath is made from Cherry Sours candy! All you do is hot glue them on around the wreath, spray paint it, and you're done! I kept this one, and it is hanging on our front door. My  niece has asked that I make her one, so I will be doing another one of these soon!


Finally, I loved the DIY Spring Wreath that was recently featured on Shanty 2 Chic, so I bought everything I needed while I was at Hobby Lobby this week. I made this one for my sister-in-law:


I plan on making more of these for friends and relatives, because they are so easy. All you do is hot glue some sheet moss to your letter, glue that on to your wreath and then make the bow. 


I loved the chevron ribbon so much that I bought it in four colors - turquoise blue, hot pink, yellow and green! It is usually $5.99 a roll but was 50% off this week - woo hoo! They had it in plenty of other colors too - I probably should have bought more!

I've got another chevron project that I made, but I'll save that for another post. Happy Weekend All :)


Tuesday, March 26, 2013

Crafting Pin-spiration

If there has ever been anything to spur on creativity, it has to be Pinterest. I have gotten more creative ideas from using this site!

 Here are a few recent craft projects that were all inspired from something I saw on Pinterest.


Argyle Heart Wreath - Tutorial HERE


Tile Coasters - Tutorial HERE

and


Burlap Easter Bunting - Tutorial HERE

I'm sure you'll be seeing many more Pinterest-inspired crafts from me in the future!

Happy Crafting Everyone.


Sunday, September 23, 2012

Easy (And Cheap!) Halloween Decor

I wanted to make something for our front door for Halloween, but didn't want to make a traditional wreath. I came up with this simple, easy project that only cost a few dollars. Here's what I made:


Can you guess what this is made out of?? Here are my supplies:


Yes, those are burner covers! They come in a package of two at Dollar Tree for the whopping price of.... you guessed it... $1. While at Dollar Tree I also purchased some foam letters and shapes, some glitter, a spool of ribbon and some big fake spiders. I spent under $10 for everything.

I started with the larger burner covers (10 inch) and spray painted them with some black spray paint I already had.


I used the spider with the smaller burner covers - I'll show you that in a minute!

Once they were dry, I played around with the foam shapes and letters till I found designs I liked. The larger shapes did not have adhesive on the back (the letters did) so I just hot glued them on to the covers.

The hardest part was figuring out how to attach the burner covers together. I tried hot glue - no luck. Then I tried my ever trusty E6000 glue - still no luck. So I had my hubby drill a small hole in each one and then attached them to each other with a small piece of wire.


The E6000 glue worked great to attach the ribbon.   So easy, right?

For the smaller (8 inch) covers I painted them with black chalkboard paint:


I chose to write "Eek" and hung a spider from the ribbon with fishing line. To give the spider some glitz, I first sprayed it with some spray adhesive, then liberally sprinkled it with glitter. I'm not sure if you can see from the photos, but the ribbon has some purple glitter in it, so it matched perfectly!


And that's it... easy and cheap Halloween decor! This would be a great project for your kids to help you with. Once you've painted them, they could do the decorating.


Linking up to these great parties:


http://www.positivelysplendid.com/


I Heart Nap Time


Friday, June 8, 2012

Birthday Shirt and Patriotic Wreath

We are going to our great-nephew's birthday party tomorrow, he turns 2 already. Seems like only yesterday I made all of his baby gifts - he was the first one I made things for when I got into sewing :)
I saw this great tutorial for an Elmo shirt, and since Kael absolutely ADORES Elmo, I knew it would be perfect for him.


This is the front of the shirt. I had a hard time finding a solid red shirt with no design or writing on the front, so I had to settle for this one with the pocket.  Here is the back:


I used my letter and number stencils and some scrap black fabric to make the "I'm 2" on the back.

When I was making Elmo's face, I sewed each piece on individually. I started with the white for his eyes, then did the orange nose, and finally the black eyes and mouth. I did a tight zig zag stitch around each one (hard to see in the picture). I adhered them with Heat n Bond, but I always like to sew them on too so they will make it through the laundry okay. I did the same thing on the back. I can't wait to see him wearing it tomorrow!


I decided to make a new Fourth of July wreath this year, as the one I made last year was just too small for our front door. Once I saw Courtney's Rag Wreath over at A Diamond in the Stuff, I knew that was what I wanted to make.

The best part of this project is that it was absolutely free!  I had a wreath form in my stash that I had already (mine was made out of pipe insulation too!) and my SIL gifted me with a bunch of fabric recently, so the fabric was free too! The ribbon came off of last year's wreath.


I cut my fabric into strips that were 2 X 12. The pipe insulation is kind of thick, so that's why I made my strips a little longer.  This is an easy project, it just takes awhile to cut all the strips and then tie them onto the wreath.

Thanks to Kirstin and Courtney for their tutorials!


Tuesday, April 17, 2012

Hello!!

Some of you probably wondered if I fell off the face of the earth!  No, I have just been keeping busy since the first of the year. We got a new puppy January 2 and she is ALOT of work!!  I had no idea! She is my first dog ever, so it has been a new experience for me.  Her name is Lulu and she is an absolutely adorable Malti-Poo:


She is 5 months old now and quite a handful. She is a little ball of energy, but she is so much fun and is a great addition to our family.

I have done some sewing projects, but unfortunately the hard drive in my computer crashed a few months ago, so I lost ALL of my pictures. I am still trying to see if I can get someone to try to recover all the stuff from that hard drive. :(


I do have a couple of recent projects I can show you though. I found a great tutorial from the Missouri Star Quilt Company for a self-binding baby blanket. You can find it here. I subscribe to their You Tube channel because they regularly post great sewing and quilting videos... be sure and go check them out. Here is what my finished blanket looks like:

And here is an up-close shot of the stitching:


I just followed along with the video and it was such an easy project. It was neat to be able to use some of the special stitches on my machine that I so rarely use. I bought some flannel on sale recently at Jo-Anns and plan on making three more of these! I think they will make great baby gifts.

I made this cute Car Cozie for our great-nephew:


It is made sort of like the crayon caddies, with pockets to hold their little cars, and a road built right in!  Tutorial can be found here.

For our nephew and his fiance, I made this pillow and then with the leftover scraps, the coasters/holder to match:


The pattern for both of these projects can be found here.

On the crafting side, I made an Easter wreath out of tulle:


I used the instructions found here.

I am currently working on baby projects; seems that there are always people I know having babies! I want to make more of those self-binding blankets, along with some pee pee tee pees, since everyone seems to be having boys!

I will post pictures when I got those projects finished. Hope everyone is doing well - I promise it won't be so long between posts next time!  :)


Friday, December 9, 2011

Christmas Crafting

I made these Christmas crafts:


Wreath made from inexpensive dollar store ornaments and a wire hanger (seen on Pinterest)


Trees made from styrofoam cones and felt (also seen on Pinterest)


Tree made from cardstock Christmas paper, wooden candle holder and wooden finial (seen here)


Burlap Snow Mama (seen here)

Sunday, October 2, 2011

More Crafts

I just realized that I have made several other crafts lately that I have not posted about yet.

This frame has been all over the blogs .... here and here is where I got my inspiration from:


Another thing that has been everywhere is the candy corn wreath.. it is so easy to make and turns out really cute:


Finally, saw this wreath over at Every Creative Endeavor and made it too:


It is an excellent tutorial, and she even gives you a link to the PDF to print out the letters onto fabric.. that's right, you print the letters out on an 8.5 x 11 piece of paper... check out the tutorial for how to do it.