Pages

Sunday, June 23, 2013

July 4th Projects

Besides Christmas, I think July 4th is one of my favorite holidays to decorate for. I crafted several things last year, and I made a few more this year. As you know, most of my crafts are easy and don't cost a lot of money to make, so I hope you give one (or more) of these a try!

First up is the Mini Wreath, which was inspired by this post. It just so happened I had a small foam wreath, linen fabric, patriotic fabric and some red burlap in my stash, so this project was easy for me to make.


I used pins to fasten the whole thing together - the stars/buttons are attached to the wreath with pearl pins.

My next project was this Patriotic Clothespin wreath for our front door:


Caity at DIY Navy Momma shared this tutorial. This was easy and fun to make, and I actually made two of them, one for me and one for a friend. Caity had the great idea of cutting a wire wreath form to get two wreaths out of one - so brilliant!

I had all of the spray paint on hand, so all I had to buy was the wreath form and the clothespins (pkg. of 100 at Wal-mart is less than $2). The only thing I did differently from her tutorial was to use contact paper I had in my stash to make the stars. I found it worked really well, as they stuck on the clothespin and were easy to remove (I have an old seam ripper that I use for craft projects - it worked great at removing the stars while they were still wet with paint!)

I saw this post by Misty at Creative Itch, but I did not want to go to the store to buy doilies. I went through my stash of scrapbook paper and came up with this:


I used my decorative-cut scissors and a hole punch and I think it turned out really cute! I had some red and white bakers twine that was perfect to string it on. 

Finally, I loved what Angie made over at The Country Chic Cottage, but I was lazy and didn't want to make fabric yo-yos. After searching through my craft supplies, here is what I made instead:
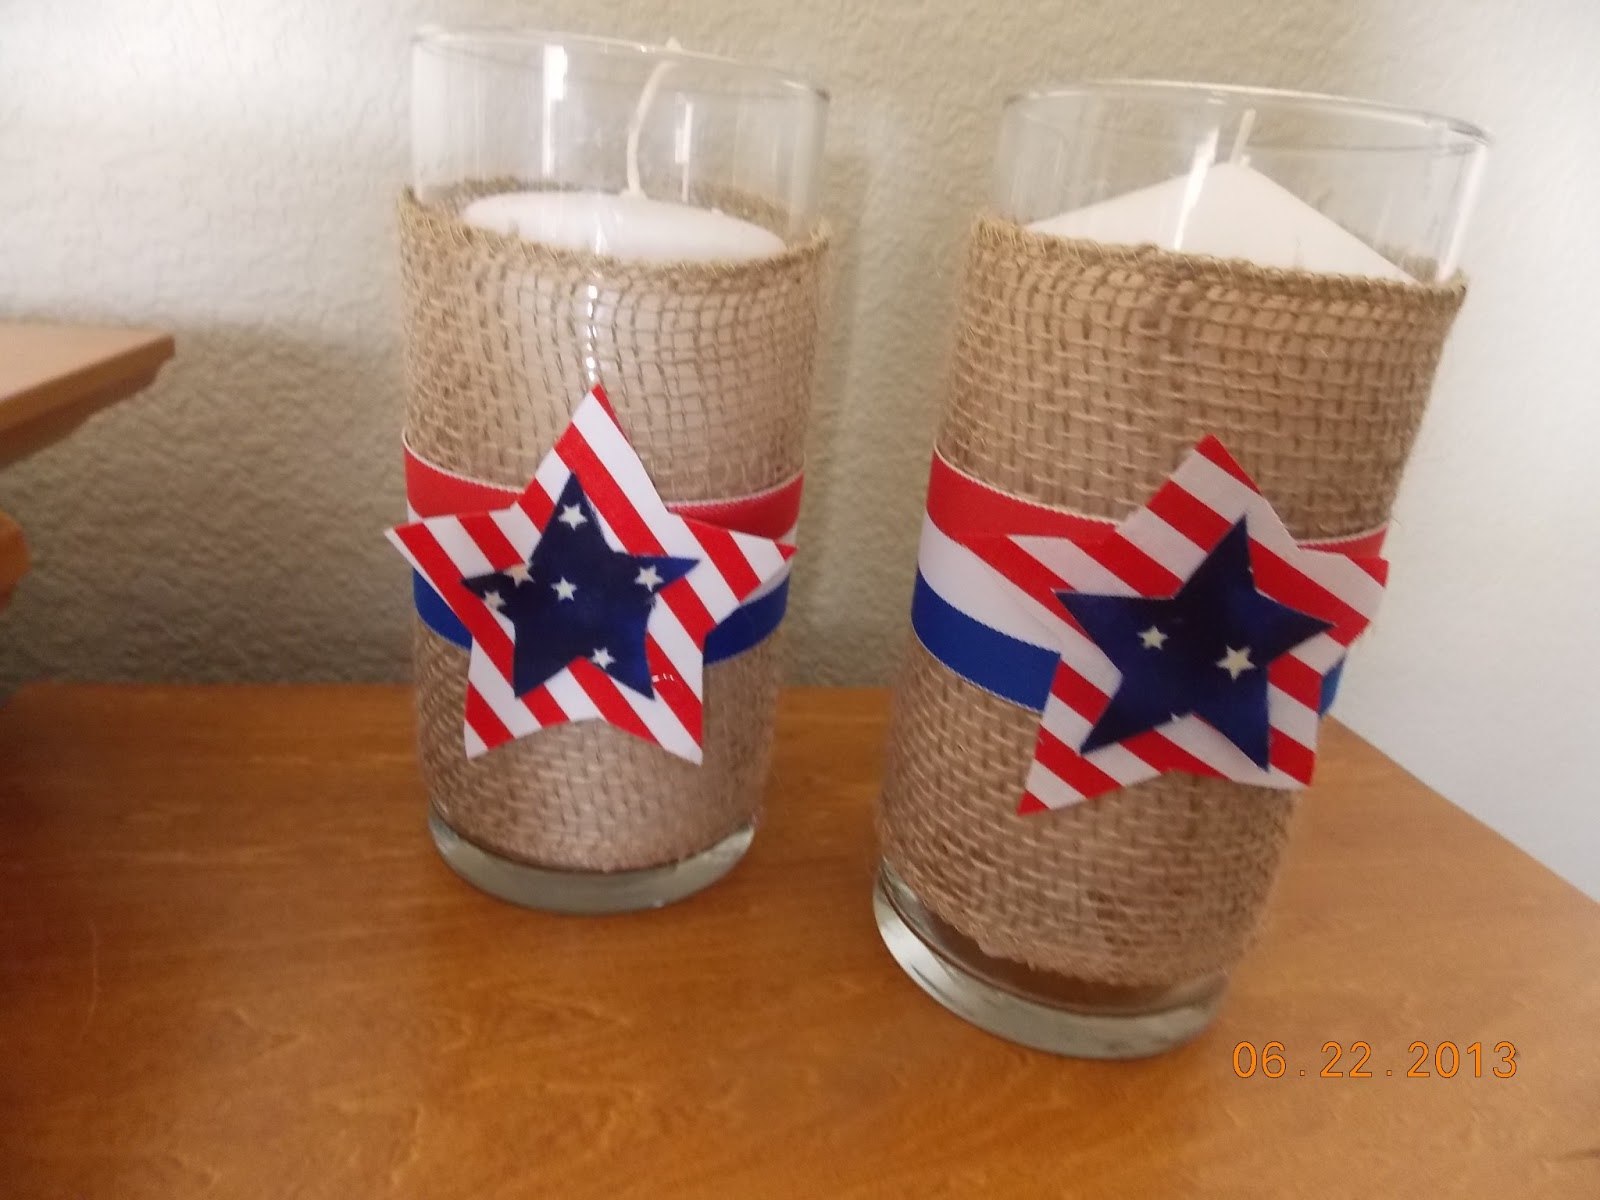

I had the burlap ribbon and red/white/blue ribbon in my stash. I hot-glued them onto the candle holder, then cut out some stars and hot glued them on as well. Easy peasy!

Happy Crafting Everyone!


Linked up to:


The 36th Avenue


Monday, June 10, 2013

Easy Summer Project to Brighten Up your Deck or Patio

Want to make a quick, easy project that will (literally) brighten up your deck or patio? Try these easy solar lights!


All you need are the following:

Bottles/jars of your choosing (mine happened to be empty Starbucks bottles)
Solar lights
Colored stones (I bought mine at Dollar Tree, it took about 6 bags to fill 4 bottles)
E6000 glue

Make sure that you get the correct size of solar light that will fit into the top of your jar or bottle. Measure the opening of your jar/bottle and then measure the solar light while at the store to make sure it will fit. (I always keep a small measuring tape in my purse, it sure comes in handy!)

Here are some other ones I made using mason jars. I had to get bigger solar lights to fit the jar:


Remove the labels off your jar/bottle (if needed), then fill it almost to the top with your colored stones. Remove the part of the solar light that sticks into the ground, you won't need it (still trying to come up with a craft for those!)  Check to make sure the light will fit securely onto the jar/bottle. If you need to, remove some of the stones.

Next, apply some E6000 glue to the rim of your jar/bottle then stick your solar light on. That's it! Told ya it was quick and easy :)  Now go put it outside in the sun and wait for the magic to happen!

You could decorate these up by adding some ribbon or twine around the neck of the jar/bottle. I would love to get my hands on some of those Anniversary Blue Mason Jars, I think they would be so great for this project.

BTW, I know my glue gun is shown in the first picture, but I found that the E6000 glue held much better. I always buy it at Wal-Mart, it is much cheaper there than at a craft store. Also, here is a tip for you so that the plastic top of the E6000 tube doesn't stick to the tube - apply some Vaseline after every use and the plastic top will come right off!

Let me know if you make some, I would love to see them!


Linking up to these great parties:


Friday, April 26, 2013

Wreath-Mania

Lately it seems that all I have been wanting to craft are wreaths - I'm not quite sure why, but for some reason I just love crafting them (and then giving most of them away!)

As usual, I was inspired by things I saw on blogs or Pinterest. This first one I made was actually a combination of two different wreath tutorials that I saw - this one here and then this one. I loved the look of the first one, but I liked how she made her flowers in the second one, so I combined the two and made this:


I used a straw wreath form and wrapped it in some burlap garland (found in the floral section at Walmart) and attached it with straight pins. Then I made my scrapbook paper flowers and pushed them into the wreath with pins. Finally, I made my ribbon and once again, just pinned it to the wreath. I think this wreath took me all of 30 minutes to make and it turned out so cute. I made it for a dear friend of mine, and I plan on making her different flowers and ribbons so that she can just remove these and change the look in a matter of minutes!

Here is the second wreath I made:


I followed the tutorial found here. Believe it or not, this wreath is made from Cherry Sours candy! All you do is hot glue them on around the wreath, spray paint it, and you're done! I kept this one, and it is hanging on our front door. My  niece has asked that I make her one, so I will be doing another one of these soon!


Finally, I loved the DIY Spring Wreath that was recently featured on Shanty 2 Chic, so I bought everything I needed while I was at Hobby Lobby this week. I made this one for my sister-in-law:


I plan on making more of these for friends and relatives, because they are so easy. All you do is hot glue some sheet moss to your letter, glue that on to your wreath and then make the bow. 


I loved the chevron ribbon so much that I bought it in four colors - turquoise blue, hot pink, yellow and green! It is usually $5.99 a roll but was 50% off this week - woo hoo! They had it in plenty of other colors too - I probably should have bought more!

I've got another chevron project that I made, but I'll save that for another post. Happy Weekend All :)


Tuesday, March 26, 2013

Crafting Pin-spiration

If there has ever been anything to spur on creativity, it has to be Pinterest. I have gotten more creative ideas from using this site!

 Here are a few recent craft projects that were all inspired from something I saw on Pinterest.


Argyle Heart Wreath - Tutorial HERE


Tile Coasters - Tutorial HERE

and


Burlap Easter Bunting - Tutorial HERE

I'm sure you'll be seeing many more Pinterest-inspired crafts from me in the future!

Happy Crafting Everyone.


Wednesday, December 12, 2012

Let's Play Catch Up!

I can't believe I haven't posted on here since September!  I figured I would do a post and show you some of the projects I've done since then.

In October I sewed some things for my great-nieces. First I made these pacifier clips:


And then these door snugglers:


I thought these were a great idea. You stretch them over the door knob in baby's room so that if you go to check on them while they are sleeping, it doesn't make noise when you open the door.

Also in October I made these cute Ipod pillows:


I keep one on my desk so that I always know where my phone is at. All of these I gave to my sister and she shared them with the girls at her office, they loved them!

In November I crafted these napkin rings out of the paper tube part of a roll of paper towels:


I hot-glued burlap around each one and then decorated them with ribbon and other fall decorations. We used these at our family Thanksgiving dinner.

So far this month I have made this pillow:


And used some glass blocks found at Home Depot to make this for my friend Kaitlin:


And this one for my Mom:


The best part about making these is that I FINALLY learned how to make bows. I have struggled with making bows, but I found a great video on You Tube that makes it so easy.


Where to find tutorials for these projects:

Pacifier Clips - http://www.danamadeit.com/2012/09/tutorial-pacifier-clips.html

Door Snuggler - http://beffie48.blogspot.com/2012/06/door-snuggler-pattern-quiets-noisey.html

IPod pillows - http://seamedsimple.blogspot.com/2011/10/normal-0-false-false-false-en-us-x-none.html

Napkin Rings - http://betterorganizedliving.com/2012/11/06/toilet-paper-napkin-rings/

Christmas Tree Pillow - http://www.thetraintocrazy.com/2012/11/12-days-of-christmas-sewing-easy-merry-pillow.html

How to Make a Bow Video - http://www.youtube.com/watch?v=gNwLVZc_VN4


Sunday, September 23, 2012

Easy (And Cheap!) Halloween Decor

I wanted to make something for our front door for Halloween, but didn't want to make a traditional wreath. I came up with this simple, easy project that only cost a few dollars. Here's what I made:


Can you guess what this is made out of?? Here are my supplies:


Yes, those are burner covers! They come in a package of two at Dollar Tree for the whopping price of.... you guessed it... $1. While at Dollar Tree I also purchased some foam letters and shapes, some glitter, a spool of ribbon and some big fake spiders. I spent under $10 for everything.

I started with the larger burner covers (10 inch) and spray painted them with some black spray paint I already had.


I used the spider with the smaller burner covers - I'll show you that in a minute!

Once they were dry, I played around with the foam shapes and letters till I found designs I liked. The larger shapes did not have adhesive on the back (the letters did) so I just hot glued them on to the covers.

The hardest part was figuring out how to attach the burner covers together. I tried hot glue - no luck. Then I tried my ever trusty E6000 glue - still no luck. So I had my hubby drill a small hole in each one and then attached them to each other with a small piece of wire.


The E6000 glue worked great to attach the ribbon.   So easy, right?

For the smaller (8 inch) covers I painted them with black chalkboard paint:


I chose to write "Eek" and hung a spider from the ribbon with fishing line. To give the spider some glitz, I first sprayed it with some spray adhesive, then liberally sprinkled it with glitter. I'm not sure if you can see from the photos, but the ribbon has some purple glitter in it, so it matched perfectly!


And that's it... easy and cheap Halloween decor! This would be a great project for your kids to help you with. Once you've painted them, they could do the decorating.


Linking up to these great parties:


http://www.positivelysplendid.com/


I Heart Nap Time


Saturday, August 4, 2012

Tote-ally Easy Totes

Do you ever have those days where you want to sew up something simple and fast? I seem to have days like that a lot!  Even though I have some projects that I really need to do, for some reason I just can't build up any enthusiasm to start them.

Yesterday was one of those days for me. I had these packs of fabrics that my Mom found for me on the clearance rack at Wal-mart for only $5.00:


Two yards of quilting fabric for $5.00..... score!  I decided I wanted to make a tote, and immediately thought of Bethany's "totetorials" (love that!) that she posted back in June on her blog Sweet Bee Buzzings.

I followed this totetorial for her one yard tote. Since I had two yards of coordinating fabric, I decided to mix and match the fabrics and make two totes.

This was an excellent totetorial to follow, with lots of good pictures to help along the way. If you are new to sewing, this is a great place to start.

Here are my finished totes:


They only took me a couple of hours to do (and that was with interruptions), and I love how they turned out. The nice thing is it folds up flat, so you could tuck it in your purse or keep it in your car for those last-minute trips to the store.  The best part is, I made two tote bags and it only cost me $5.00.... it's not often I can say that!

The solid green bag is going to my niece, and I am keeping the floral one for myself! I think I might add a crocheted flower to the front to dress it up a little bit.

Bethany has several other great totetorials (and tutorials!) on her blog that I want to try. She is a sewist and crocheter like me, plus she has a great sense of humor, so I love reading her blog. Go check it out!