Pages

Wednesday, July 31, 2013

Goin' to the Dogs

I made our adorable Malti-poo Lulu a dog harness (sorry, could not find a photo of her in it!) These are so fast and easy to make, and you probably already have everything you need to make one in your sewing stash, except for maybe some "D" rings.

I used THIS tutorial, which is awesome. Erin includes templates you can use, and gives great detailed instructions with photos.

I made some more the other day for a friend:


Here are some up-close photos:


For the outside fabric I used cotton, and for the inside fabric (the side that rests along the dog's body) I used a soft flannel. 

I found a package of 4 "D" rings at Wal-mart in the button section and I think it was only .78 cents. They can also be found at Jo-Ann or Hobby Lobby. 


Finally, Silhouette

I got my Silhouette Cameo for Christmas two years ago, but I have only just started using it. Crazy, I know! I guess I was intimidated by it, so it was easier just to let it sit and gather dust rather than attempt to use it.

After seeing so many neat projects out there in blogland, I bit the bullet and decided to go for broke. Now I'm so glad I did, and I have lots more projects I want to make. Here are the projects I have done so far:


"Welcome" vinyl sign for our front door


Vinyl lettering for dog and cat food containers


Vinyl labels for my Flour, Sugar and Brown Sugar containers.


In addition, I used the Silhouette to cut out a stencil so that I could make this cute burlap garden flag:


Tutorial for this project can be found HERE.  I used white contact paper instead of the more expensive vinyl to cut out my stencil and it worked perfectly. 

Here are some things I learned along the way:
  • Vinyl can be expensive - the best place to buy it is on the internet.  I ordered some from Amazon, but Expressions Vinyl has good deals too.
  • In order to peel away your design, you will need some type of transfer tape. I used clear contact paper and it worked wonderfully, and is much less expensive than buying transfer tape from Silhouette or another source. I also saw suggestions on line that said you could use blue painters tape or even Press N Seal, but I have not tried either of those methods yet.
  • You need to make sure that whatever medium you are using is securely underneath the rollers, or else it will not cut straight (ask me how I know this). If you are using the cutting mat, you shouldn't have this problem - it usually happens when you load the vinyl in without the mat.
  • There are lots of great tutorials and videos out there to help with the learning curve for this machine. Silhouette has a blog with lots of projects, and Pinterest has lots of great info too. 

I plan on labeling lots more stuff in my home, as well as making subway art, using the heat transfer vinyl, and cutting fabric too. Stay tuned!


Monday, July 15, 2013

New Projects and...

I recently purchased a yard of fabric that was just perfect for a friend of mine. She loves and collects Matryoshka dolls, so I knew I had to get it and make her some special things.  Here is what I ended up making for her:


From the top of the picture going to the right:  Jar cozy, the zippered pouch I told you about in my last post, a small fabric tray, and a sunglasses case. I still have some fabric left, so I need to figure out a few more small items to make with it.

This is the only picture I took of the sunglasses case, because it did not turn out at all how I wanted and to me was a project fail. I followed a tutorial from a fairly well-known blogger and it was HORRIBLE!! Not only were the directions minimal at best, but I e-mailed the blogger and asked her for help and she has never responded. That was July 3rd - still no response from her. Good thing I didn't wait for her, or it would never have gotten finished. As it was, I just kind of had to wing it and figure out another way to finish the case.  Her original case had a bow on it and here were her instructions for that:  "Sew on a bow."  That was it - no directions, nothing. She didn't even tell you how to make the bow. To make matters worse, her photos used white fabric with a white background - it was impossible to see the stitching, or anything she had done. 

I am not going to mention any names, because maybe she has a good reason for not responding.  As I looked back through her blog, most of her tutorials are the same - very minimal directions and photos.   It doesn't really matter though, because I have stopped following her and will never use another of her tutorials again.

Which leads me to my rants.... 
  • We as bloggers need to remember that our audience consists of BEGINNING sewers as well as more experienced ones. 
  • More, more and more!! The more information and photos the better. I do not see it as "talking down" to your readers, but rather, trying to give them the most information possible so that their project will turn out well.
  • Whenever I make a project from a blogger's tutorial, I always read through the comments. I have learned the hard way that I have to do this, otherwise I will never know what is missing or incorrect in the tutorial. 
  • I want my end result to look like yours - so if you're going to use any kind of interfacing, please be specific about what kind/type you used. It is very frustrating to have to play the guessing game and try to figure out what you have used. 
  • Finally, if I let you know I used your tutorial, and gave you a link to my blog post about it, the least you can do is acknowledge it in some way. A comment or a simple thank you is much appreciated. 

I know I only have a very small readership, and half of you probably don't even read my posts, and few of you ever even comment.  The people who need to see this will probably never see it. But at least I feel better for getting that off my chest!  Thanks if you're still reading  :0)


Thursday, July 11, 2013

Best Zip Pouch You Will Ever Make

If you want to make a cute and EASY zippered pouch, look no further than Bethany's tutorial at Sweet Bee Buzzings for her Straight Sided Flat Bottomed Pouch. I made one the other day and it is so awesome I had to share it with you. I have since made another one, and have plans for about six more!

Here is the first one I made:


And here is the second one:


So proud that I matched up my seams:


I have used one of Bethany's tutorials before (you can find my post about it here) and once again, I was not disappointed. Her tutorials are always excellent, with great directions and photos to help you along the way.

If you want something different, she also has tutorials for a Boxy Pouch (I definitely want to try that one), a Front Zip Pouch, and a Double-Zip Wristlet.

Go make one, or a bunch of these - you won't be disappointed!


Monday, July 8, 2013

Cutest Baby Dress Ever!

When I came across the Criss Cross Dress Tutorial over at Melly Sews, I immediately fell in love with it and knew I had to make one. Look how adorable this is:


(Photo from Melly Sews)

Did I have a baby girl to make this for? Nope. Did I make one anyway? Yep!!

It really is an easy dress to sew, and doesn't it look so sweet on Melly's model?

I loved the seersucker fabric she used, so I followed suit. I appliqued a flower on the front of my dress.


As it turns out, a friend of my sister just had a baby, so I will gift it to her!

You can make the ruffly bloomers to match, and I will admit they were a bit of a challenge for this newbie sewer, but I think they came out alright. There is a link to her post on how to make them at the bottom of the post for the dress. 


Here is the front of the dress:


and here is the back:


Love, love, love it! Thanks so much Melly for such a wonderful and easy tutorial.


Sunday, June 23, 2013

July 4th Projects

Besides Christmas, I think July 4th is one of my favorite holidays to decorate for. I crafted several things last year, and I made a few more this year. As you know, most of my crafts are easy and don't cost a lot of money to make, so I hope you give one (or more) of these a try!

First up is the Mini Wreath, which was inspired by this post. It just so happened I had a small foam wreath, linen fabric, patriotic fabric and some red burlap in my stash, so this project was easy for me to make.


I used pins to fasten the whole thing together - the stars/buttons are attached to the wreath with pearl pins.

My next project was this Patriotic Clothespin wreath for our front door:


Caity at DIY Navy Momma shared this tutorial. This was easy and fun to make, and I actually made two of them, one for me and one for a friend. Caity had the great idea of cutting a wire wreath form to get two wreaths out of one - so brilliant!

I had all of the spray paint on hand, so all I had to buy was the wreath form and the clothespins (pkg. of 100 at Wal-mart is less than $2). The only thing I did differently from her tutorial was to use contact paper I had in my stash to make the stars. I found it worked really well, as they stuck on the clothespin and were easy to remove (I have an old seam ripper that I use for craft projects - it worked great at removing the stars while they were still wet with paint!)

I saw this post by Misty at Creative Itch, but I did not want to go to the store to buy doilies. I went through my stash of scrapbook paper and came up with this:


I used my decorative-cut scissors and a hole punch and I think it turned out really cute! I had some red and white bakers twine that was perfect to string it on. 

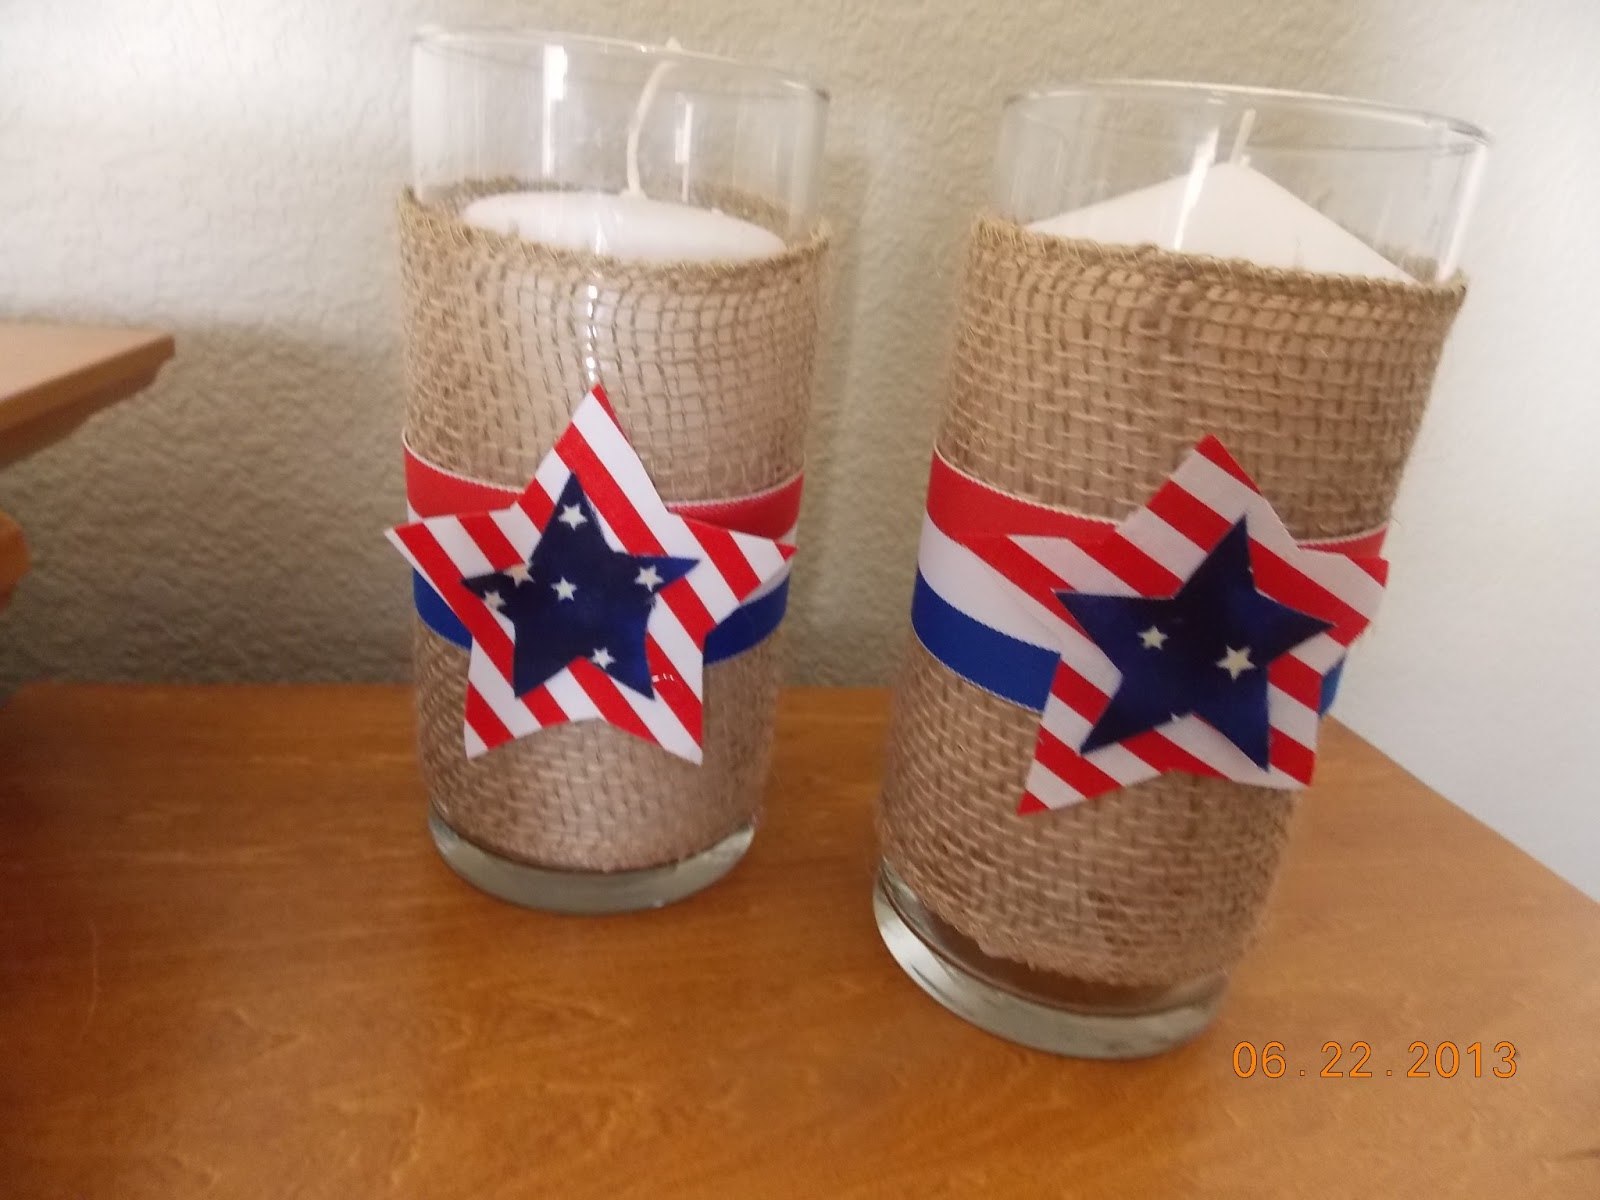
Finally, I loved what Angie made over at The Country Chic Cottage, but I was lazy and didn't want to make fabric yo-yos. After searching through my craft supplies, here is what I made instead:


I had the burlap ribbon and red/white/blue ribbon in my stash. I hot-glued them onto the candle holder, then cut out some stars and hot glued them on as well. Easy peasy!

Happy Crafting Everyone!


Linked up to:


The 36th Avenue


Monday, June 10, 2013

Easy Summer Project to Brighten Up your Deck or Patio

Want to make a quick, easy project that will (literally) brighten up your deck or patio? Try these easy solar lights!


All you need are the following:

Bottles/jars of your choosing (mine happened to be empty Starbucks bottles)
Solar lights
Colored stones (I bought mine at Dollar Tree, it took about 6 bags to fill 4 bottles)
E6000 glue

Make sure that you get the correct size of solar light that will fit into the top of your jar or bottle. Measure the opening of your jar/bottle and then measure the solar light while at the store to make sure it will fit. (I always keep a small measuring tape in my purse, it sure comes in handy!)

Here are some other ones I made using mason jars. I had to get bigger solar lights to fit the jar:


Remove the labels off your jar/bottle (if needed), then fill it almost to the top with your colored stones. Remove the part of the solar light that sticks into the ground, you won't need it (still trying to come up with a craft for those!)  Check to make sure the light will fit securely onto the jar/bottle. If you need to, remove some of the stones.

Next, apply some E6000 glue to the rim of your jar/bottle then stick your solar light on. That's it! Told ya it was quick and easy :)  Now go put it outside in the sun and wait for the magic to happen!

You could decorate these up by adding some ribbon or twine around the neck of the jar/bottle. I would love to get my hands on some of those Anniversary Blue Mason Jars, I think they would be so great for this project.

BTW, I know my glue gun is shown in the first picture, but I found that the E6000 glue held much better. I always buy it at Wal-Mart, it is much cheaper there than at a craft store. Also, here is a tip for you so that the plastic top of the E6000 tube doesn't stick to the tube - apply some Vaseline after every use and the plastic top will come right off!

Let me know if you make some, I would love to see them!


Linking up to these great parties: